 Further to writing my last post about setting up a wireless IP camera system I coincidentally soon after received a call from the customer that bought the system from us last time. This time he wanted a similar installation but in a different holiday village that is part of the same group of hotels.
So I was asked for a 6 camera system in a very large hotel apartments site, the place is so large that running cables will be massively expensive however from the roof of the main hotel building there is line of sight to every one of the 30 or so hotel apartment blocks so we were asked for a wireless camera system (like last time but with less cams).
So soon enough I was off to do the site survey. When I got there I was amazed that the whole holiday apartments site was an exact replica of the place I did a similar installation at last year. The place had been built in the same way and this meant the exact same challenges as last years installation. This was good for me because I knew exactly what I was up against and put in an offer with a tried and tested solution with a few performance modifications. After quoting for the job amongst other companies we won the job for a second time as clearly no other company knew how to tackle the job with a realistic budget.
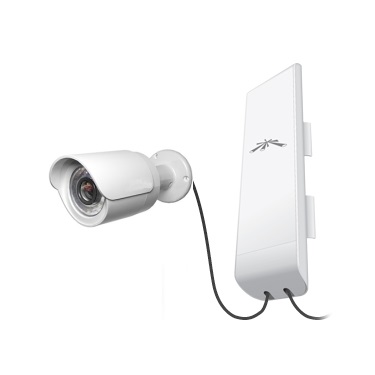
After the challenges I had last time with flashing Linksys routers with DD-WRT, crimping coaxial cables, running power + CAT5 cables, sealing connectors, putting antennas on poles and using large enclosures and multiple power supplies for everything I knew I could eliminate a lot of this work, which is extremely time consuming and costly by simply using Ubiquity Nanostations and PoE capable cameras. The Nanostation provided me with an outdoor access point and an antenna combined, which are powered by remote PoE (Power over Ethernet) injectors so I am able to put the unit on the wall and use a single CAT5 cable run to an electrical enclosure to power the unit and transfer data from the IP camera. The X-Vision IP cameras that I used were also powered by the CAT5 data-cable via a second PoE injector in the electrical enclosure. All of this eliminated the need for the combination of CAT5, power and coaxial cabling, which was used last time – the only cabling required this time was screened CAT5e (this provided a good cost saving). If anyone is reading this and considering doing a similar job please don’t consider normal power supplies over PoE injectors as the time and materials you will save on an installation from using PoE equipment is unbelievable… trust me just use PoE if you can, even if the PoE equipment may cost more to buy you will save so much on the installation.
With my experience from the job last year I knew that I did not want to have 6 wireless clients all transmitting data to a single access point as last time I did this and had to put some serious restrictions on frames per second and video compression, which affected the performance of the system. Therefore, this time I knew that I could safely have up to 3 wireless clients connected to a single access point and streaming video at high quality without any performance issues. So I designed the system with two main access points and 6 wireless clients (3 clients to each AP and 1 client to each camera location). The cameras were initially to be located on the walls of apartment blocks, which were remote to the viewing and recording device in the main hotel building. Then the customer made some changes to the camera locations and 2 of them were to be located on the wall of the main building (as opposed to the apartment blocks) and hence could be wired to the managers office, which is were the NVR (network video recorder) was to be located. This left me with 2 main access points and 4 wireless clients (2 clients to each AP), which I knew would give me flawless video. I also knew to use 5GHz WiFi equipment and not 2.4GHz as this place was covered with 2.4GhZ WiFi antennas to provide Internet to the guests.
Also, because our customer wanted a price as low as possible they asked if they could do as much of the installation work as possible, which we agreed to. So, I designed the solution, put together a plan of work for the hotels maintenance department and we got started – here is a list of the equipment we used:
- 6x X-Vision X720B cameras – 1.3mp day/night cams, PoE capable
- 1x X-Vision N400R network video recorder
- 1x Standard 19″ LCD Monitor (AOE branded)
- 6x Ubiquity Nanostation M5
- 6x Nanobrackets
- 6x Ubiquity 24v PoE injectors
- 6x TP Link TL-POE150S – 802.3af power injectors, up to 48v ouput
- 1x TP-Link TL-SF1008P – 8 port switch with 4 PoE ports
- 2x 305m rolls of screened CAT5e (marked as sFTP cable)
- MaTterials included only small IP rated enclosures for outdoor CAT5 connections and screws
The plan was to put these cameras on the main IT network of the hotel so that the manager, assistant manager and receptionists could all login remotely and view the cameras. First, I checked for free IP address ranges by inspecting the network. I did this by logging into the router and seeing what devices and IP’s have been used recently. I also used 2 Windows tools called TCP Net Viewer and Net World Scanner, which scan all IP’s in a given subnet. Once I identified a good IP range I programmed all of the Ubiquity Nanostations and IP cameras in our office before we installed the equipment. I used the stock Ubiquity firmware this time and I have to say this made life 10x easier than using DD-WRT on Linksys routers. I simply set the Ubiquity equipment up as two independent point to multi-point bridges. The AP’s were in “AP + Bridge” modes and the clients were in “Station + Bridge” modes – I used a strong WPA2 AES password, left the channels to automatically find the least congested channel, put the devices with static IP’s within the same IP plan as the network they would sit on and the job was done. The customer did all of the wiring, provided the electrical enclosures and then with our help installed all of the access points and cameras at the specified locations. The installation was completed within a few days – last time with normal power supplies, power + coaxial cabling, coax crimping and enclosures and a few more cameras it took us more than 2 weeks.
Anyway once everything was complete I turned everything on and low and behold nothing worked… well we had connection to all of the access points but no cameras worked. I later found out that I had made a mistake as I tried using the Ubiquity PoE power injectors and a Ubiquiti PoE switch to power the cameras. At first I thought that maybe the cameras were not PoE capable as it wasnt stated on the box anywhere, although it is on the camera suppliers website. A quick call confirmed they were PoE capable and I then started reading about PoE. The Ubiquity injectors were 24v and I had read something about others being 48v. I then found out that Ubiquity PoE was not standard PoE and only worked with Ubiquity equipment (hells bells)! Standard PoE, which has the IEEE standard of 802.3af has up to 48v DC power output but has to handshake with the device, find out what their voltage requirements are and deliver accordingly, whether it be 5v, 12v, 48v or whatever, and if it is plugged into a non PoE device it would not send any power so it doesnt fry anything. I quickly got on the Internet and found some suitable 802.3af compliant PoE power injectors by TP-Link, which I can recommend… the part number is TL-POE150S, which is an injector (not to be confused with their splitter, which has a different application). I also purchased a TP Link 8 port switch with 4 PoE ports with part number TL-SF1008P, which was used to power the 2 cameras on the main hotel building and was located next to the NVR. Once I plugged it in everything worked, phew!
I was astonished by the quality of the video. We were using new cameras that were not available last year, which I think helped a bit but the real bang was each Ubiquity AP provided a steady 8mbps of streaming video (combined from 2 clients) without any delays, freezing or compression issues whatsoever. Ok, wireless-N is capable of up to 150Mbps but in practice at a distance you will never get anything near that reliably, especially with multiple clients. The cameras were running at 720p and 25 frames per second with a low level of video compression and the video was flawless! Much much better than many wired cameras I have seen elsewhere. It was a massive step up in performance than the system that was delivered last year. I mainly put that down to the fact that last year we were running wireless G on the congested 2.4GHz band, with external antennas, long coaxial cables and Linksys routers with DD-WRT firmware. Using wirless-N at the non-congested 5GHz band with built for the purpose Nanostations with no coaxial cables definitely nailed it.
If I were to be given another Wireless IP camera job again I would do everything exactly the same again as I feel I have found the best practice way of doing such an installation, which I have only have been able to get to through experience of WiFi and IP camera capabilities and requirements.